Sourdough Starter Easy Recipe – Make Bubbly Bread at Home 🍞✨
Discover how to create a sourdough starter easy recipe that’s perfect for beginners!
With just flour and water, you can start a living starter that grows strong and bubbly. This starter brings a delicious tangy flavor and amazing texture to your homemade bread.
It’s simple, fun, and doesn’t need any fancy ingredients. With daily feeding and a little patience, your starter will be ready to bake soft loaves, crusty bread, pizza bases, and even pancakes.
Enjoy the joy of fresh, homemade sourdough every day! 🌱🥖
What is Sourdough Starter Easy Recipe 🍞✨
A sourdough starter is the magical base that brings your bread to life! 🌱
It’s a simple mixture of flour and water that naturally ferments over time, capturing wild yeast and beneficial bacteria from the environment.
This living culture is what gives sourdough bread its signature tangy flavor, chewy texture, and irresistible aroma.
Unlike store-bought yeast, a sourdough starter develops slowly, creating depth and complexity in your bread. It’s not just an ingredient—it’s a little ecosystem that grows and strengthens with each feeding.
Beginners often find it intimidating, but with the easy recipe, anyone can create a starter at home without any fancy tools or complicated techniques.
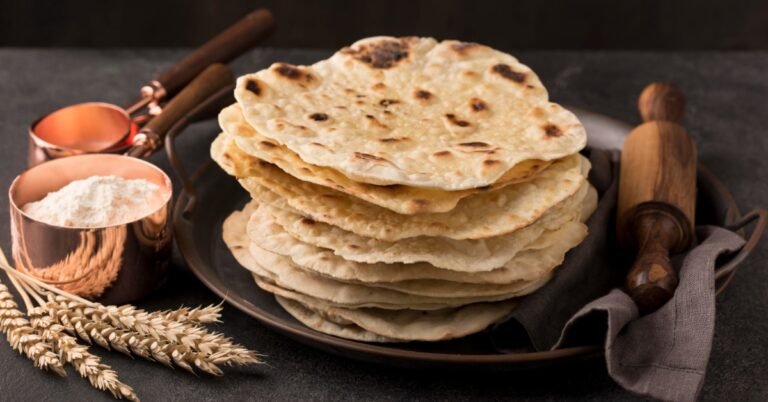
The beauty of a sourdough starter is its versatility. Once active, it can be used to bake a wide variety of breads, from rustic loaves to soft sandwich bread, and even pancakes or pizza dough! 🍕🥖
It’s cost-effective, natural, and fun to watch grow. Over days, you’ll notice bubbles forming and a pleasant tangy smell, signaling that your starter is ready to bring your baking adventures to life.
Starting your sourdough journey is simple, rewarding, and a little addictive—because there’s nothing like the smell of fresh homemade sourdough straight from your oven! 😍
Why I Love This Recipe ❤️🍞
There’s something truly magical about making a sourdough starter from scratch! ✨ What I love most about this easy recipe is how simple it makes the whole process.
With just flour, water, and a little patience, you can create a living culture that will transform ordinary ingredients into delicious, tangy bread. It’s empowering to know that something so simple can produce such incredible results. 🌱
This recipe is beginner-friendly, so even if you’ve never baked bread before, you can confidently start your sourdough journey.
Watching the starter bubble and grow over a few days is like seeing a tiny miracle happen right in your kitchen! 🥖 The aroma of fermentation is subtle but comforting, hinting at the rich flavors that are soon to come.
Another reason I love this recipe is its versatility. Once your starter is active, it opens up endless possibilities: soft sandwich loaves, crusty artisan bread, pizza bases, or even pancakes! 🍕🥞 It’s also cost-effective and natural—no need for store-bought yeast or additives.
Finally, this recipe makes baking feel rewarding and personal. There’s a sense of accomplishment in nurturing your starter, feeding it, and then turning it into warm, homemade bread that fills your home with joy. 😍
Ingredients for Sourdough Starter Easy Recipe 🥣✨
Creating a sourdough starter is simpler than you might think! You only need a few basic ingredients, and they are easy to find in any kitchen. Here’s what you’ll need:
-
All-purpose flour or whole wheat flour 🌾 – Provides the natural sugars and nutrients for the yeast and bacteria to grow.
-
Filtered or bottled water 💧 – Chlorine-free water helps your starter develop without any interference.
-
A clean glass jar or container 🥛 – For mixing and letting your starter ferment.
-
A spoon or spatula 🍴 – To stir and feed the starter daily.
-
A breathable cover (like a kitchen towel or loose lid) 🌬️ – Allows air in while keeping dust and debris out.
Optional but helpful:
-
A small digital scale ⚖️ – Ensures precise measurements, especially if you want consistent results.
-
Extra flour 🌾 – For feeding your starter each day.
That’s it! Just these simple ingredients are all you need to start a living culture that will grow into amazing sourdough bread.
With only flour and water as the base, you can begin a rewarding baking adventure right from your kitchen. 🥖💛
How to Make Sourdough Starter Easy Recipe 🥖✨
Making your own sourdough starter is simple and fun! Just follow these steps carefully, and you’ll have a lively, bubbly starter in no time:
-
Mix the flour and water 🌾💧
-
In a clean glass jar, combine 1/2 cup of flour with 1/4 cup of filtered water.
-
Stir well until there are no dry spots, creating a smooth, thick batter-like consistency.
-
-
Cover loosely 🌬️
-
Use a kitchen towel or a loose lid to cover the jar. This allows air in but keeps dust out.
-
-
Let it rest ⏳
-
Leave the jar at room temperature for 24 hours. You may notice a few bubbles forming—this is a good sign!
-
-
Feed your starter daily 🥣
-
Each day, discard about half of the starter.
-
Add 1/2 cup of flour and 1/4 cup of water, stirring until smooth.
-
Repeat this process every day for about 5–7 days.
-
-
Watch it grow 🌱
-
Your starter is ready when it doubles in size within 6–8 hours after feeding and has a pleasant, tangy aroma.
-
-
Use or store 🥖
-
Once active, your starter can be used for baking.
-
If not baking daily, store it in the refrigerator and feed it once a week to keep it healthy.
-
With just a little patience and daily care, you’ll have a living starter that brings incredible flavor and texture to your homemade bread! 😍
Tips for Perfect Sourdough Starter Easy Recipe 🌟🍞
Creating a strong, bubbly sourdough starter takes a little patience and care. Here are some helpful tips to ensure your starter thrives:
- Use room temperature water 💧 Water that is too hot can kill the yeast, while very cold water slows down fermentation.
- Choose the right flour 🌾 Whole wheat or rye flour gives your starter extra nutrients and encourages faster bubbling.
- Keep it in a warm spot ☀️ A cozy corner in your kitchen, around 70–75°F (21–24°C), helps the starter grow consistently.
- Feed consistently 🥣 Feeding at the same time every day keeps your starter healthy and active.
- Watch the bubbles 🌱 Small bubbles and a light tangy smell are signs your starter is developing properly.
- Don’t worry about liquid separation 💦 Sometimes a dark liquid (“hooch”) forms on top. Stir it in or pour it off before feeding—both are fine!
- Be patient ⏳ It may take 5–7 days for your starter to fully mature. Rushing the process can affect flavor and rise.
- Use clean utensils and jar 🍴🥛 Prevent contamination by always using clean spoons and jars.
Following these tips will help you create a reliable and strong starter that makes your sourdough baking experience smooth and enjoyable! 😍
Step-by-Step Instructions for Sourdough Starter Easy Recipe 🥖✨
Follow these simple steps to create a healthy and bubbly sourdough starter from scratch:
-
Prepare your jar 🥛
-
Use a clean glass jar, about 1-liter size. Make sure it’s free from soap residue to avoid affecting fermentation.
-
-
Combine flour and water 🌾💧
-
Add 1/2 cup of flour and 1/4 cup of filtered water. Stir until smooth, forming a thick batter-like consistency.
-
-
Cover loosely 🌬️
-
Place a kitchen towel or loose lid over the jar to allow air in but prevent dust from falling inside.
-
-
Let it rest ⏳
-
Keep the jar at room temperature for 24 hours. Some small bubbles may appear—this is normal.
-
-
Feed your starter daily 🥣
-
Discard about half of the starter.
-
Add 1/2 cup of flour and 1/4 cup of water and mix well.
-
Repeat every 24 hours for about 5–7 days.
-
-
Monitor growth 🌱
-
Your starter is ready when it doubles in size within 6–8 hours after feeding and has a pleasant, tangy smell.
-
-
Store or use 🥖
-
Use your starter immediately for baking, or store it in the refrigerator if you won’t be baking daily. Feed it once a week to keep it active.
-
-
Optional: Adjust consistency 💧
-
If the starter is too thick, add a little water. If it’s too thin, add a bit more flour to maintain a pancake-batter-like consistency.
-
Following these steps ensures a strong, active starter that will give your bread a wonderful texture, flavor, and aroma. 😍🍞
How to Maintain Your Sourdough Starter 🌱🍞
Keeping your sourdough starter healthy is simple once you understand the basics. Follow these easy steps to ensure it stays strong and active:
-
Regular feeding 🥣
-
Feed your starter once a day if kept at room temperature.
-
Use equal parts flour and water each time and stir well.
-
-
Refrigeration for slower growth ❄️
-
If you don’t bake every day, store your starter in the refrigerator.
-
Feed it once a week to maintain activity.
-
-
Check consistency 🌾💧
-
Your starter should be thick but pourable, like pancake batter. Adjust flour or water if needed.
-
-
Watch for bubbles and smell 🌱
-
A healthy starter will double in size after feeding and have a pleasant, slightly tangy aroma.
-
-
Discard before feeding ✂️
-
Remove about half of the starter before adding fresh flour and water. This prevents overgrowth and keeps it manageable.
-
-
Use clean utensils 🍴
-
Always use clean spoons and jars to avoid contamination.
-
-
Revive if needed ⚡
-
If your starter becomes sluggish, feed it twice a day for a couple of days to bring it back to life.
-
With consistent care, your starter can last for years, giving you endless opportunities to bake fresh, flavorful bread anytime! 🥖💛
Common Mistakes to Avoid When Making Your Sourdough Starter ❌🍞
Starting a sourdough culture is simple, but a few common mistakes can slow its growth or affect its flavor. Knowing these pitfalls in advance helps you create a strong, healthy starter from day one.
One of the most frequent mistakes is using chlorinated water 💧. Tap water with chlorine can inhibit yeast growth. Always use filtered or bottled water for best results.
Another common issue is inconsistent feeding 🥣. Starters thrive on routine. Skipping feedings or feeding at irregular intervals can weaken the starter and slow fermentation.
Temperature problems are also a big factor 🌡️. A starter kept in a cold spot may ferment too slowly, while extremely hot conditions can kill the natural yeast. Keep it in a warm, stable place, around 70–75°F (21–24°C).
Many beginners also discard too little or too much starter ✂️. Removing about half each feeding keeps the culture healthy and prevents it from becoming unmanageable.
Finally, panicking at the sight of liquid on top (called hooch) or bubbles forming too slowly can be discouraging. These are normal signs of a fermenting starter. Simply stir it in or pour off the hooch and continue feeding.
By avoiding these common mistakes, your sourdough starter will grow strong, bubbly, and full of flavor, ready to make amazing bread every time! 🥖💛
FAQs About Sourdough Starter Easy Recipe ❓🥖
Here are some common questions beginners ask about making and maintaining a sourdough starter:
Q1: How long does it take for a starter to be ready? ⏳
A1: Usually, it takes 5–7 days for a starter to become active and bubbly enough for baking. You’ll notice it doubling in size after feeding and developing a tangy aroma.
Q2: Can I use tap water? 💧
A2: It’s best to use filtered or bottled water. Chlorinated tap water can slow down or even stop the fermentation process.
Q3: Why is my starter not bubbling? 🌱
A3: Slow bubbling can happen if the temperature is too cold, feedings are inconsistent, or the flour lacks nutrients. Keep it in a warm spot and feed daily to encourage activity.
Q4: What is the hooch on top of my starter? 🍶
A4: Hooch is a dark liquid that forms naturally when your starter is hungry. Stir it in or pour it off, then feed your starter—it’s completely normal.
Q5: How do I store my starter long-term? ❄️
A5: Keep it in the refrigerator and feed it once a week. Bring it back to room temperature and feed it a few times before baking for best results.
These simple answers help you keep your starter healthy, active, and ready for delicious baking adventures! 😍
Final Thoughts on Sourdough Starter Easy Recipe 🍞💛
Creating your own sourdough starter is more than just making bread—it’s an experience that connects you with the natural process of fermentation and the joy of baking from scratch. 🌱
Watching your starter bubble, grow, and develop its tangy aroma is incredibly rewarding, and it gives every loaf a unique flavor that store-bought yeast can’t match.
This easy recipe proves that you don’t need complicated techniques or fancy ingredients to start your sourdough journey.
With just flour, water, and a little patience, anyone can cultivate a living starter that brings life and character to their baking. 🥖✨
Maintaining your starter is straightforward once you understand the routine of feeding and storing it. Over time, you’ll gain confidence in predicting its growth, adjusting consistency, and knowing exactly when it’s ready for baking.
Your starter can become a long-term companion in your kitchen, giving you delicious bread for months—or even years!
Most importantly, this process encourages patience, care, and creativity. From rustic loaves to soft sandwich bread, pizza bases, or pancakes, your starter opens up endless possibilities.
There’s nothing quite like enjoying warm, homemade sourdough fresh from the oven—a simple pleasure that never gets old. 😍🍞
Embrace the process, nurture your starter, and enjoy the journey—it’s as rewarding as the bread itself! 🌟