Peanut Butter Oreo Pie Recipe – Creamy, Chocolatey, and Easy to Make
Discover the perfect Peanut Butter Oreo Pie Recipe that is rich, creamy, and full of flavor.
This easy dessert combines a crunchy Oreo cookie crust with a smooth peanut butter filling for a delightful treat.
No baking is required, making it simple and quick to prepare for family gatherings, parties, or special occasions.
Top it with whipped cream or extra crushed Oreos for added indulgence.
Enjoy a dessert that is both impressive and delicious with minimal effort, guaranteed to satisfy every sweet tooth.
What is Peanut Butter Oreo Pie Recipe?
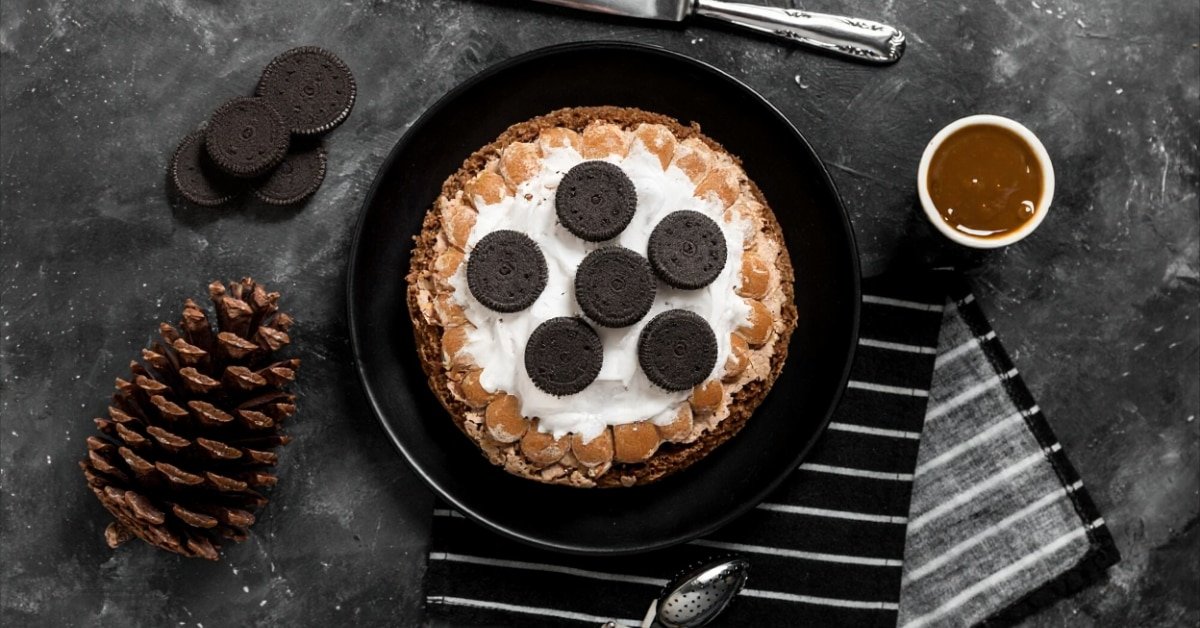
Peanut Butter Oreo Pie Recipe is a rich and creamy dessert that combines the bold flavor of peanut butter with the classic chocolate crunch of Oreo cookies.
This pie is usually made with a crushed Oreo crust, a smooth peanut butter filling, and a light, fluffy texture that melts in your mouth.
It is often a no-bake dessert, which makes it quick and simple to prepare without needing an oven.
This dessert is popular for its perfect balance of sweet and salty flavors.
The chocolatey base adds a deep, slightly crisp layer, while the peanut butter filling creates a soft and creamy contrast.
Some versions also include whipped topping or cream cheese to enhance the texture and taste, making each bite smooth and satisfying.
Peanut Butter Oreo Pie is a great choice for family gatherings, parties, or whenever you want an easy yet impressive dessert.
It can be made ahead of time and chilled until ready to serve, which makes it very convenient.
Whether you are a beginner or experienced in the kitchen, this recipe is simple to follow and delivers delicious results every time.
Why I Love This Recipe
I love this Peanut Butter Oreo Pie Recipe because it is simple, quick, and always turns out delicious.
It does not require baking, which saves time and makes the process easier, especially on busy days.
With just a few basic ingredients, you can create a dessert that looks and tastes like something from a bakery.
Another reason I enjoy this recipe is the perfect combination of flavors.
The rich peanut butter filling blends beautifully with the chocolate Oreo crust, creating a balanced taste that is both sweet and slightly salty.
The texture is also very satisfying, with a creamy and smooth filling that contrasts nicely with the crunchy base.
This recipe is also very flexible. You can adjust the sweetness, add toppings like chocolate chips or whipped cream, or even make it lighter based on your preference.
It is a great dessert to serve at family gatherings, birthdays, or casual get-togethers because everyone seems to enjoy it.
Most importantly, it is a reliable recipe that never disappoints. Whether you are making it for the first time or the tenth, it consistently delivers a rich, creamy, and crowd-pleasing result.
Ingredients Peanut Butter Oreo Pie Recipe
- Oreo cookies
These are used to create the base of the pie. Crushed Oreo cookies form a rich, chocolatey crust that adds a slightly crunchy texture. - Unsalted butter
Melted butter helps bind the crushed cookies together, making the crust firm and easy to slice after chilling. - Creamy peanut butter
This is the main ingredient for the filling. It gives the pie its smooth texture and rich, nutty flavor. - Cream cheese
Softened cream cheese adds a creamy and slightly tangy taste, balancing the sweetness of the dessert. - Powdered sugar
This sweetens the filling and blends easily, creating a smooth and lump-free mixture. - Whipped cream or whipped topping
It makes the filling light and airy, giving the pie a soft and fluffy texture. - Vanilla extract
A small amount enhances the overall flavor and adds a pleasant aroma. - Chocolate chips or chocolate syrup (optional)
These can be added for extra chocolate flavor and decoration. - Crushed Oreos for topping (optional)
Sprinkled on top for added crunch and a visually appealing finish.
All these ingredients work together to create a perfectly balanced, creamy, and delicious dessert.
Kitchen Tools You’ll Need
- Mixing bowls
You will need at least one large bowl to prepare the filling and another for mixing the crust ingredients. Using separate bowls keeps the process clean and organized. - Food processor or blender
This helps crush the Oreo cookies into fine crumbs quickly. If you do not have one, you can place the cookies in a sealed bag and crush them with a rolling pin. - Measuring cups and spoons
Accurate measurements are important to get the right texture and taste. These tools help ensure each ingredient is added in the correct amount. - Spatula or spoon
A spatula is useful for mixing the filling smoothly and scraping down the sides of the bowl. It also helps spread the filling evenly into the crust. - Electric mixer or hand whisk
An electric mixer makes it easier to blend the cream cheese and peanut butter into a smooth and creamy mixture. A hand whisk can also work but may take more effort. - Pie dish or pan
This is used to shape and hold the pie. A standard pie dish works best for even layers and easy serving. - Refrigerator
Chilling the pie is essential to set the filling and give it the perfect texture before serving.
How to Make Peanut Butter Oreo Pie Recipe
- Prepare the crust
Crush the Oreo cookies into fine crumbs using a food processor or by hand. Mix the crumbs with melted butter until well combined. Press the mixture firmly into a pie dish to form an even base. Place it in the refrigerator to set. - Make the filling
In a large bowl, add softened cream cheese and creamy peanut butter. Beat them together until the mixture becomes smooth and creamy with no lumps. - Add sweetness and flavor
Mix in powdered sugar and a small amount of vanilla extract. Continue mixing until everything is fully combined and the texture is soft and smooth. - Fold in whipped cream
Gently fold whipped cream or whipped topping into the mixture. This step gives the filling a light and airy texture, making the pie soft and easy to slice. - Assemble the pie
Take the chilled crust out of the refrigerator. Pour the peanut butter filling into the crust and spread it evenly using a spatula. - Chill the pie
Place the pie in the refrigerator for at least 4 to 6 hours, or until it is fully set. This step is important for the best texture. - Add toppings and serve
Before serving, top with crushed Oreos or drizzle chocolate syrup for extra flavor. Slice and enjoy.
Tips for Perfect Peanut Butter Oreo Pie Recipe
- Use softened cream cheese
Make sure the cream cheese is soft before mixing. This helps create a smooth filling without lumps and blends easily with other ingredients. - Choose creamy peanut butter
Creamy peanut butter gives the best texture. Avoid using very thick or natural peanut butter, as it can affect the smoothness of the filling. - Crush Oreos finely
For a firm crust, crush the cookies into fine crumbs. Large pieces can make the base crumbly and harder to slice neatly. - Press the crust firmly
When forming the crust, press it down well using a spoon or flat surface. This helps the base hold its shape after chilling. - Do not overmix the filling
Mix just until everything is smooth. Overmixing can make the filling too soft and affect the final texture. - Chill for enough time
Allow the pie to chill for at least 4 to 6 hours. This step is important to help the pie set properly and make clean slices. - Add toppings before serving
For the best look and taste, add crushed Oreos or chocolate drizzle right before serving. - Keep it refrigerated
Always store the pie in the refrigerator to maintain its shape and freshness.
Variations and Substitutions
- Use a different cookie base
If you do not have Oreos, you can use chocolate biscuits, graham crackers, or digestive biscuits. Each option gives a slightly different taste and texture. - Try crunchy peanut butter
For added texture, you can replace creamy peanut butter with crunchy peanut butter. It adds small peanut pieces that give a slight bite in every slice. - Make it lighter
You can use low-fat cream cheese and light whipped topping to reduce the richness. This keeps the pie creamy while making it a bit lighter. - Add chocolate flavor
Mix melted chocolate into the filling or add a layer of chocolate ganache on top. This enhances the chocolate taste and makes the dessert more indulgent. - Use different toppings
You can top the pie with chopped peanuts, chocolate chips, caramel drizzle, or even peanut butter sauce for extra flavor. - Make it mini-sized
Instead of one large pie, divide the mixture into small cups or jars. This is perfect for serving at parties or gatherings. - Try a frozen version
Place the pie in the freezer instead of the refrigerator for a firmer, ice cream-like texture. It is refreshing and great for warm days. - Adjust sweetness
You can reduce or increase the powdered sugar based on your taste preference to get the perfect level of sweetness.
Serving Suggestions
- Slice and serve chilled
Always cut the pie into slices while it is fully chilled. This helps maintain clean edges and prevents the filling from becoming too soft. - Add fresh toppings
Sprinkle extra crushed Oreos, chocolate shavings, or chopped peanuts on top to enhance the presentation and add texture. - Pair with sauces
Drizzle chocolate, caramel, or peanut butter sauce over each slice. This adds flavor and makes the dessert more indulgent. - Serve with ice cream
A scoop of vanilla or chocolate ice cream alongside the pie creates a creamy, rich combination that complements the flavors. - Garnish with whipped cream
Adding a dollop of whipped cream on top of each slice makes the dessert more visually appealing and adds a light, airy texture. - Use small cups for parties
For gatherings, serve the pie in small dessert cups or jars. This makes it easy for guests to enjoy and keeps portions manageable. - Pair with beverages
Serve with coffee, milk, or a milkshake. The flavors pair well and create a satisfying dessert experience. - Seasonal variations
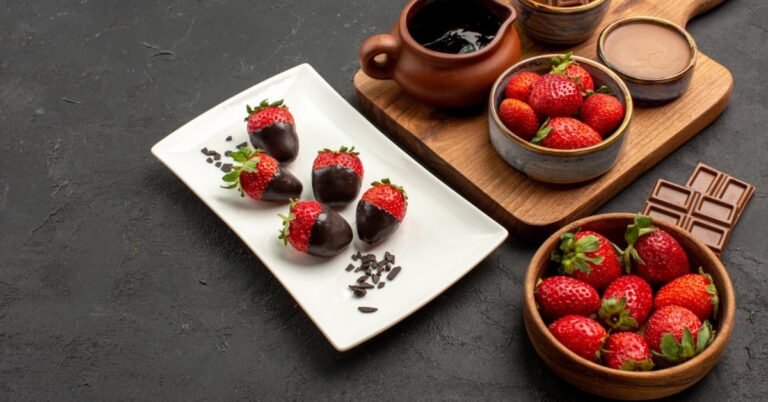
You can add seasonal toppings like strawberries, raspberries, or even a sprinkle of cinnamon for extra flavor and decoration.
These serving suggestions ensure the pie looks attractive and tastes even better when enjoyed.
Storage Instructions
- Refrigerate immediately
After preparing the pie, store it in the refrigerator. Keeping it chilled helps the filling maintain its shape and keeps the crust firm. - Use an airtight container
Cover the pie with plastic wrap or place it in an airtight container to prevent it from absorbing other odors in the fridge. - Keep for up to 5 days
The pie stays fresh for about 4 to 5 days in the refrigerator. It is best to consume it within this period for the best flavor and texture. - Avoid leaving at room temperature
Do not leave the pie out for long periods, as the filling may soften and lose its shape. Always return it to the fridge after serving. - Freezing option
You can freeze the pie for up to 1 month. Wrap it tightly in plastic wrap and then in foil to protect it. Thaw it in the refrigerator before serving. - Cutting after storage
For clean slices, chill the pie for at least an hour after storage. Use a sharp knife and wipe it clean between cuts. - Toppings before serving
Add any extra toppings, like crushed Oreos or whipped cream, only right before serving. This keeps them fresh and prevents them from getting soggy.
These steps ensure that the pie stays fresh, tasty, and ready to enjoy whenever needed.
FAQs:
Q: Can I make this pie ahead of time?
A: Yes, this pie can be made a day or two in advance. Simply prepare it, cover it with plastic wrap, and refrigerate. Chilling helps the filling set properly, making slicing easier and keeping the texture perfect.
Q: Can I use crunchy peanut butter instead of creamy?
A: Yes, crunchy peanut butter can be used if you prefer a slightly textured filling. Keep in mind that the pie will have small peanut pieces throughout, giving it a different bite.
Q: Can I use a different cookie for the crust?
A: Absolutely. Chocolate biscuits, graham crackers, or digestive cookies can be used as an alternative. Just crush them finely and mix with butter to form a firm base.
Q: How long should I chill the pie?
A: The pie should chill for at least 4 to 6 hours. Longer chilling can make the filling firmer and easier to slice. Overnight chilling also works well if you are preparing it in advance.
Q: Can I freeze the pie?
A: Yes, the pie can be frozen for up to a month. Wrap it tightly with plastic wrap and foil. Thaw it in the refrigerator before serving to maintain its texture and flavor.
Q: Can I add toppings?
A: Yes, toppings like crushed cookies, chocolate drizzle, chopped peanuts, or whipped cream can be added before serving to enhance flavor and presentation.
Final Thoughts
Peanut Butter Oreo Pie is a dessert that brings together rich flavors and smooth textures in a simple and satisfying way.
Its combination of a chocolatey crust and creamy peanut butter filling makes it a favorite for both casual treats and special occasions.
The pie is versatile, easy to make, and can be customized with different toppings or variations to suit personal tastes.
One of the best aspects of this dessert is how approachable it is. Even those with little experience in the kitchen can create a pie that looks impressive and tastes amazing.
With a few basic ingredients and some simple steps, you can have a dessert that is ready to chill and serve in just a short amount of time.
Another advantage is its convenience. The pie can be made ahead of time and stored in the refrigerator, making it perfect for gatherings, birthdays, or unexpected guests.
It also keeps well, so you can enjoy it over several days without losing its texture or flavor.
Overall, this dessert is a crowd-pleaser that delivers a perfect balance of sweetness and richness.
It is easy to prepare, adaptable, and delicious, making it a reliable choice whenever you want a treat that impresses without requiring complicated techniques.